
Google Chrome has been serving millions of users all over the globe for a while now.
Great speed, excellent features, and extreme simplicity have all made it the most popular solution to browse the internet. But have things gone bad now? Are you getting a painfully slow browsing experience on Chrome after the Windows 10 upgrade? You might be saying yes that is the truth indeed! Let’s try out a few simple steps that might do the trick for you. So let’s take a look at the methods to fix Google Chrome slow down issue in Windows 10.
If you’re short on time, you can rely on ST Cleaner to speed up Chrome automatically. It performs Web Clean as well as System Junk cleaning within minutes. And the results are sure to exceed your expectations.
Chrome Painfully Slow? Download its Optimizer
ST Cleaner is compatible with Windows 10/ 8.1/ 8/ 7/ Vista & XP
Disable Unnecessary Plugins and Extensions
Once you’ve discovered that Google Chrome is slowing down, the first thing you ought to do is disable any unnecessary plugins and extensions. If you have installed too many plugins for no good use, here is the moment to get rid of them. So disabling the extra bit over here should bring a marked improvement in Chrome’s performance. Here is how you disable the plugins and extensions in Chrome.
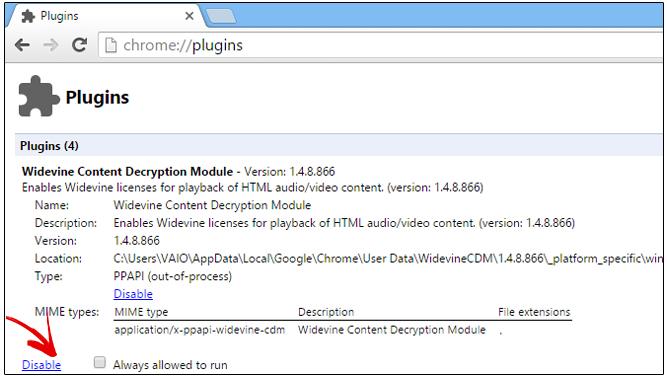
To Disable Google Chrome Plugins
- Open Google Chrome.
- Type “chrome://plugins” in the address bar and press Enter.
- Locate the unnecessary plugins. Now click on the “Disable” link next to every plugin you want to remove.
To Disable Google Chrome Extensions
- Open Google Chrome.
- Type “chrome://extensions” in the address bar and then press Enter.
- Find any unnecessary extension and uncheck the “Enabled” checkbox next to its name.

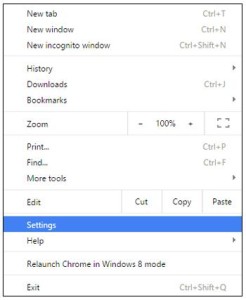
- You can also access the plugins via the menu bar. To do so, click on the menu icon. Then click on the “Settings” option. Once you are in the settings window, choose the Extensions option just above the Settings on the top left side of your screen.
Clear Browsing Data
The quantity of browsing data and history saved in your browser depends on how frequently and for how longer periods you browse the web. This may cause Chrome to run slow on Windows 10. So you should clear up the browsing data.
Note: You can also use the Ctrl+H shortcut for accessing the History window easily.
- Open Google Chrome.
- Click the Menu button placed in the top-right corner and then click on ‘Settings’.
- Navigate to the History section on the next window.
 Note: You have two choices now. You can either choose to clear the entire browsing data or select some specific items to be removed. I strongly recommend choosing the former.
 - Click on the “Clear browsing data…” button.
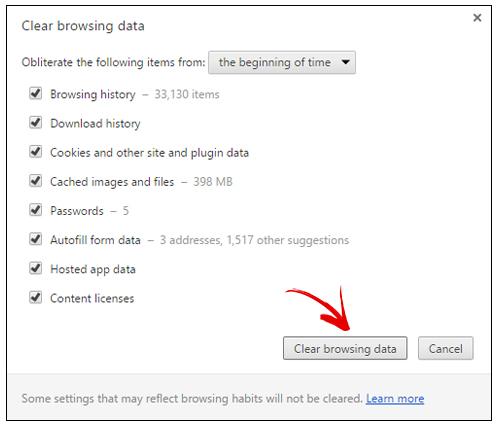
- Now you will see a window.
- Choose the “Beginning of time” option from the drop down menu. (By default it will be “the past hour”)
- Now click on the “Clear browsing data” button. The entire history including, passwords, auto fills, content licenses, cookies, will be cleared by Chrome. This will provide a huge relief to you in terms of browser performance as you’ve just removed a colossal burden from Chrome.
Try Google Software Removal Tool
Google recently launched the Google Software Removal Tool that helps to fix problems caused by spyware or software programs which conflict with the application. Usual problems like unexpected browser crashes can be easily fixed by this tool.
- Download and install the Google Chrome Cleanup tool which is currently available for Windows 10 and previous versions.
- Follow the on-screen instructions.
- Check your Browser again.
- When you re-open the browser, it will ask you to reset the browser settings and data. Resetting them will be more helpful to fix problems caused by any misconfiguration or bad data. So resetting the browser data is highly recommended.
Try the Previous Version of Chrome
The latest version of Google Chrome might be behind the trouble as the integration between the Windows 10 and Chrome may not be able to gel in seamlessly. Trying the previous version might pay off. To install the previous version of Chrome, follow the steps given below.
- Uninstall Google Chrome from Windows Program Uninstaller located in Control Panel.
- Download the previous version of Chrome from some trusted sources like Filehippo or CNET.
- Install the previous version and check if the issue is resolved. If it still persists, continue to the next method.
Use Hardware Acceleration
Hardware acceleration is a good feature delivered by Chrome for an even better browsing experience. However, it may slow down your browser considerably. So you should check if the option is enabled or not. If it is enabled, you should disable it. To do so:
- Open Google Chrome.
- Click the Menu button in the top-right corner and then click on the ‘Settings’ option.
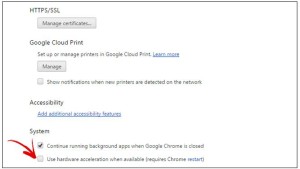
- Now, the Settings screen will open up. Scroll down and find the System section. (You need to click the “Show advanced settings…” option to explore more settings).

- Under the System section, uncheck the checkbox of the “Use hardware acceleration when available.” Option.
- Restart Chrome.
- This might help you to increase the performance of the browser as it helped me big time.
Got the Super Browser Back?
Any of the above-mentioned methods worked? Got your Chrome for Windows 10 back to its optimum speed? The methods we’ve listed in this article are tested and worked perfectly for us. So we hope they will work out for you too for increasing the browser speed. If yes, don’t forget to share the word with others. We’re always happy to hear from you. If the problem is still bothering you, please feel free to contact us. We’re here for you.