Dropbox is a cloud file storage where supports saving all kind of files. Users can easily sync Dropbox with their computer/ laptop/ smartphone and seamlessly access their data from any corner on the globe by entering in the correct login credentials.
Delete Duplicate Zip Files from Dropbox
Clone Files Checker is a digitally signed, verified software
The free Dropbox package provides 2GB of storage space, and is enough for storing a huge quantum of notepad file, documents and presentations. However, if the user intends to save images, videos or Zip files, this storage quota will seem very minimal and the user will run out of storage space very soon!
Users can top up that storage quota by subscribing to one of the paid membership plans Dropbox offers, and they can also ensure they’re making super efficient usage of their storage quota by removing duplicates from their account. This scenario is bound to affect every single computer user sooner or later, and must be guarded against by using an effective solution. Today we’ll be looking at a specific case where the presence of duplicate Zip files has resulted in a lot of storage space being wasted.
Solution
This guide requires the user to install Clone Files Checker, a state-of-the-art duplicate cleaning utility to cleanup duplicate Zip files from Dropbox easily and securely.
- Download and install Clone Files Checker.
- Now launch Clone Files Checker through it’s desktop shortcut.
- Navigate to the Cloud Scan tab and click it.
- Select Dropbox from the available options.
- Click the Load Drive button to gain access to Dropbox.
- Enter your Dropbox account credentials and click Sign in.

Dropbox Sign in portal for Clone Files Checker - Click Yes in the next dialog to give your permission to CFC accessing your Dropbox data.
- Now simply select the folder(s) that have to be scanned for duplicate Zip files.

- In the final step before the actual scan is launched, select the radio boxes for Custom and Archives. This selection basically limits the scope of the scan, and concludes the scan quickly than carrying out a universal filetype scan.
- Click Start Search to initialize the scan.

Opting for Custom file scan type - The scan will be over within a flash and bring up results which you can view in the Clone Files Checker user interface. The footer of the software will also be showing up a summary of the total duplicate Zip files detected as well as the storage space lost to them.

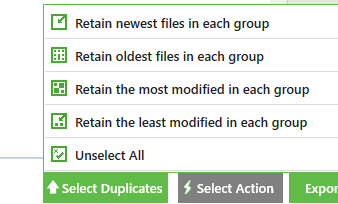
- Click the Select Duplicates button and choose an option of your liking.
- The final step involves clicking Select Action and choosing between permanently deleting the duplicate files and moving the duplicates to another folder.
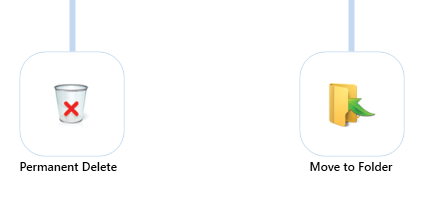
The final step
Note: Dropbox tends to be on the slower side, so you will have to wait for sometime before the changes being made as a result of the action you chose in step # 11 are successfully synced to the cloud.