Windows 10 periodically reboots on its own and then pops up a very critical KMODE EXCEPTION NOT HANDLED system error. The error occurs during Kernel Mode Operations. It occurs due to outdated drivers, bad startup items, file system errors or incorrect system settings.
The emergence of a wide variety of errors in the computer can also be traced to a troublesome Windows Registry. It is one of those critical areas of the operating system, on which the entire computer’s performance hinges upon. Regularly sorting and defragging the Registry can greatly reduce the chances of such out of the blue errors troubling you.
Uninstall Problematic Drivers
This error occurs when hardware devices connected to your computer don’t work properly, especially due to incomplete driver installation or compatibility issues. Device Manager has a feature which detects all malfunctioning devices. Such devices are indicated with a yellow colored exclamation mark. Here’s how to activate that feature and remove non-functioning device drivers.
- Press Windows Key + X; choose Device Manager.
- Expand the top node on the left pane.
- Click the View tab and choose Show hidden devices.
- Uninstall every single device with a yellow color exclamation mark by (Right-click > Uninstall)
- After removing all such malfunctioning devices, restart the computer. Press Windows Key + X; choose Shut down or sign out | Restart.
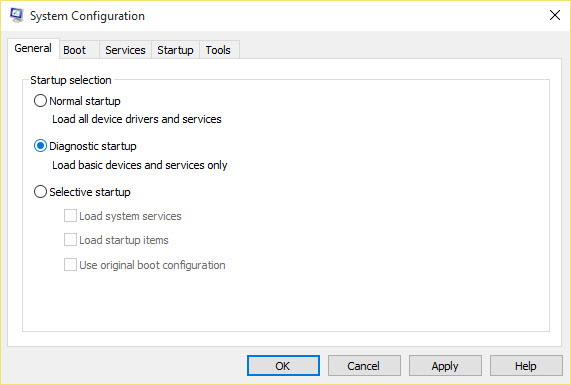
Perform Diagnostic Startup
Diagnose problems with startup programs or drivers using the System Configuration utility. The steps are given below:
- Press Windows Key + R; type MSConfig and click OK.
- Select Diagnostic startup option from the General tab.
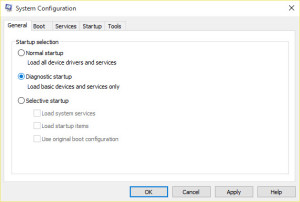
Diagnostic startup - Click Apply | OK.
Perform Check Disk
The Check Disk command will fix problems pertaining to logical file system and system integrity. Run the command in an elevated Command Prompt.
- Type CMD in the Search box on your Taskbar.
- Right click CMD from Search Results and choose Run as administrator option from the Context Menu.
- Execute the following command:
chkdsk /F /R
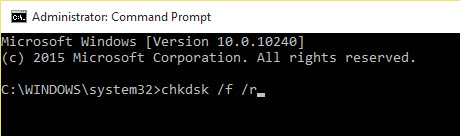
- When you’re asked to reboot, press Y key and press Enter.
- Now Command Prompt will start scanning for and repair any disk drive issues.
Turn On Legacy Advanced Boot Menu
Your computer’s boot menu policy appears to be corrupted. Use the BCDEDIT command during the troubleshooting process to fix the problem.
- Restart your computer.
- Press F2 or Delete key repeatedly until BIOS Configuration screen is displayed.
- Set the First Boot Device as your DVD ROM Drive and Second Boot Device as Hard Disk.
- Insert Windows installation disc in your DVD Drive.
- Go to Exit menu in the BIOS Configuration screen, select Save changes and exit.
- Your computer will restart. Press Enter when you’re prompted to press any key.
- Click Next on the welcome page and then click Repair your computer.
- Click Troubleshoot icon on the subsequent page.
- Click Advanced Options | Command Prompt.
- Execute the following command:
BCDEDIT /SET {DEFAULT} BOOTMENUPOLICY LEGACY - After successful execution, type EXIT and press Enter.
- Exit the installer wizard and boot Windows in normal mode.