Amazon Cloud Player is an online media player which allows users to play music files that are purchased from the Amazon store. The advantage of Amazon cloud player over other traditional media players is that it lets the users play music online and from any device as long as the users have access to their Amazon account which contains all the music that has been purchased.
The biggest drawback of Amazon Cloud Player is not being able to deal with duplicate files. This article talks about how to clear the duplicate music files in the Amazon Cloud Player with Clone Files Checker.


Clone Files Checker for Windows and Mac is a verified software
Compatible with Windows 10/ 8.1/ 8/ 7 and Mac OS 10.10 onwards
By clicking to download, you agree to these Terms
See Windows Features | Mac Features
Solution
- Download Amazon Music for PC and Mac from the following web address: http://www.amazon.com/gp/feature.html/?ie=UTF8&docId=1001067901
- Install it and then launch the program.
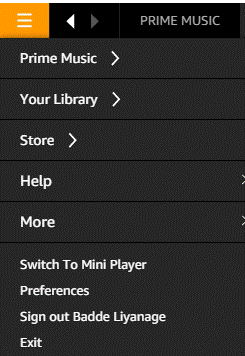
- Click on the 3 horizontal lined button and then select Preferences.

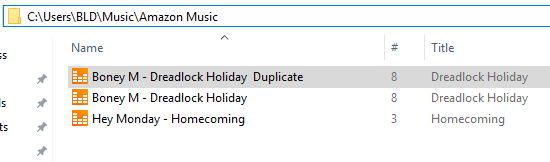
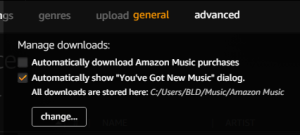
Select Preferences - Switch to general and notice where the music files are stored after downloading them from the Amazon Store. The default location is %userprofile%/Music/Amazon Music
- Now navigate to that location.

Amazon Music folder - Open Clone Files Checker.
- Click the Music Search tab.
- Click on the Add button in the Section 1.
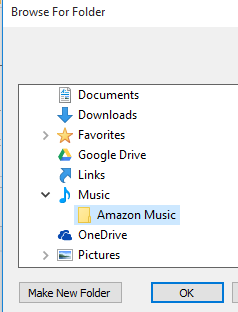
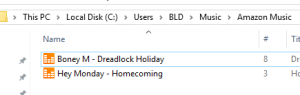
- Browse to the location where music files are stored after they’re downloaded from Amazon Store (step # 5). The folder name is Amazon Music.

Amazon Music Folder - Select Amazon Music folder and add it in Clone Files Checker.
- Check Title from Step 2.
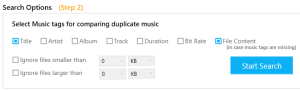
- Now click on Start Search to initiate the search for duplicate music files.
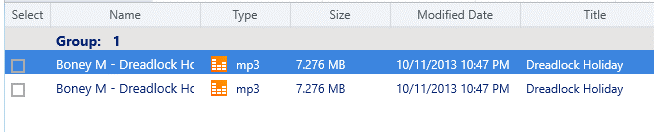
- When the Clone Files Checker detects any duplicate music files, it will show them in the bottom-most panel.

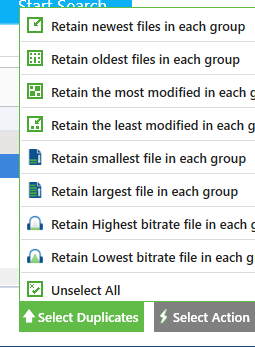
Duplicate Music Detected! - Find the Select Duplicates button at the bottom of the Clone Files Checker. Select it and then select Retain newest files in each group. This makes sure only the newest files are kept and all older versions of that file are removed.

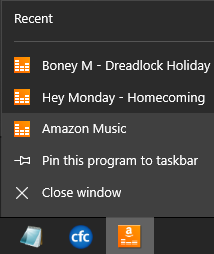
- Quit Amazon Music.
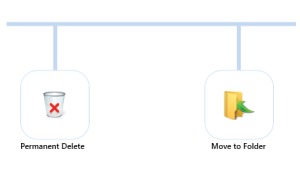
Quit Amazon Music - Click Select Action in Clone Files Checker user interface.
- Click on Permanent Delete or Move to Folder. The former deletes the files permanently from the system and the cloud while the latter moves them to a different location (user-defined).
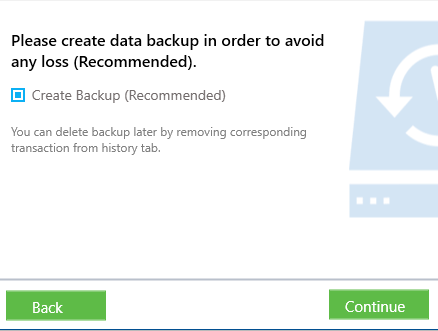
Select the appropriate option - Create a backup of the files if necessary. Next, Continue to proceed to the final phase.

Backup your files - The actual duplicate deletion / moving process will be launched.

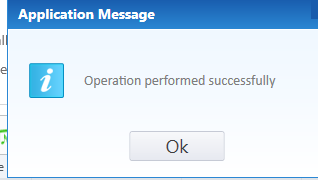
- Once the process is over, a dialog box will appear on the screen as per the following screenshot.

Operation concluded successfully - Now manually check the Amazon Music folder to make sure all duplicate files have disappeared.
Dupes Gone! - Now open the Amazon Music application to start syncing the changes with the Cloud.
- Now visit Amazon Cloud Player from your browser to witness the recent changes. Use the following default address to do so: https://www.amazon.com/gp/dmusic/cloudplayer/web/