When it comes to live broadcast, ManyCam caters to the needs of almost every user. Be it an individual or a business, the compatibility of ManyCam wins over everyone. And when it is used as a team with Webex, the whole experience is top-notch in all aspects.
What is Webex?
Webex is an online platform that allows users to connect and virtually meet other people without ever having to leave their home or office. Webex offers its users to conduct meetings both via a computer and a separate phone line. In addition to that, Webex is also available for download on cellphone devices and runs perfectly on Android and iOS. Not only that, as a great addition, it also supports Siri. One standout feature of Webex is that it is compatible with smartwatches such as the Apple Watch. If you are using Webex, you are sure not to miss any meeting regardless of how busy your schedule is.
Can I use ManyCam With Webex?
ManyCam can be easily integrated with Webex by following a series of simple steps. So let’s jump into the solution without any further ado.
Step 1: Log-In
The first step of using ManyCam with Webex is to log-in to both ManyCam and Webex. Launch the applications, enter your login credentials and click Next.
Step 2: Setting a Preset
Once you have signed into both ManyCam and Webex, you will need to set up a Preset in ManyCam. ManyCam allows its users to share content with the participates through different options. Setting up a Preset is both simple and easy. All you have to do is to simply navigate to the Preset section and choose a Preset option of their choice. Next, select Desktop and All displays for the application to stream the content or the app running on your desktop.
Step 3: Start a Meeting
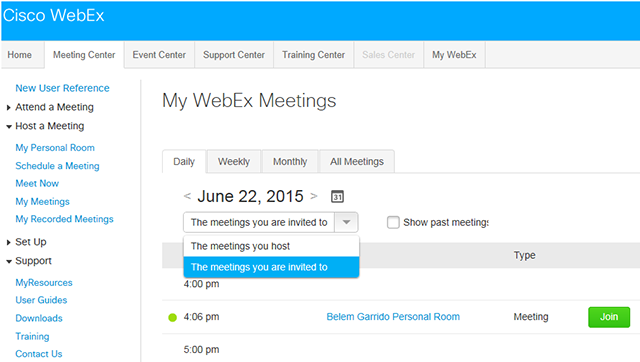
After you have logged-in to your Webex account, select Host a Meeting and then click on Schedule a Meeting. If there is an Advanced Scheduler page present, click Quick Scheduler. Next, select a Meeting Type and then enter Meeting Topic. Type in the meeting password and click Enter to confirm the password.
Now specify the Time, Date and Duration. Enter the email addresses of the participants you would like to invite. Click the Start button if you want to start with the meeting now or click Schedule Meeting if you want it to be held at a particular date.
Step 4: Audio & Video Setup (Webex)
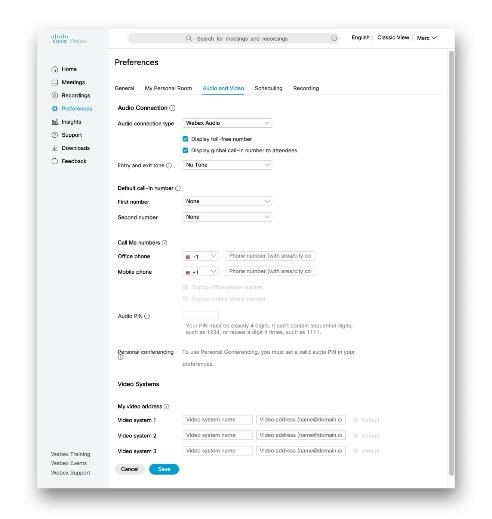
Webex allows its users to change and test both sound and video settings at QuickStart/Product Roadmap Overview screen or by visiting the Preferences section. After making the changes, the user can test the audio and video connection to make sure everything is fine.
Step 5: Share Content
Once the meeting has started, navigate to Settings and locate the Camera section. Simply choose ManyCam Virtual Webcam. Now click Start Meeting again to invite participants to this meeting.
Select the Preset on ManyCam, which contains the content you want to share and then click Trans to share the content on Webex.
Price Comparison
ManyCam
For Individuals
Standard
- $29/Year or $69 Lifetime
Studio
- $59/Year or $119 Lifetime
Premium
- $79/Year or $149 Lifetime
For Businesses
Enterprise 3
- $119/Year or $298 Lifetime
Enterprise 5
- $189/Year or $475 Lifetime
Enterprise 10
- $279/Year or $798 Lifetime
Webex
Free
- 30-day free trial
Starter
- $13.50 per host/month
Plus
- $17.95 per host/month
Business
- $26.95 per host/month
Enterprise
- Contact Webex for flexible subscription plans