Windows builds a cache of the most frequently accessed files to make your computer run faster, smoother, and responsive. Nonetheless, there are several occasions when things become the exact opposite of it. If you don’t have tons of storage available, eventually the cache occupies a significant part of your hard drive’s left-over free space and makes your computer run into different issues.
Your computer becomes slower, unresponsive, or even crashes for apparently no meaningful reason. Therefore, it’s a good practice to regularly clean your Windows 10 computer cache and keep your computer running like newer. Let’s discuss the process in detail.
Clear Cache Using “Disk Cleanup”
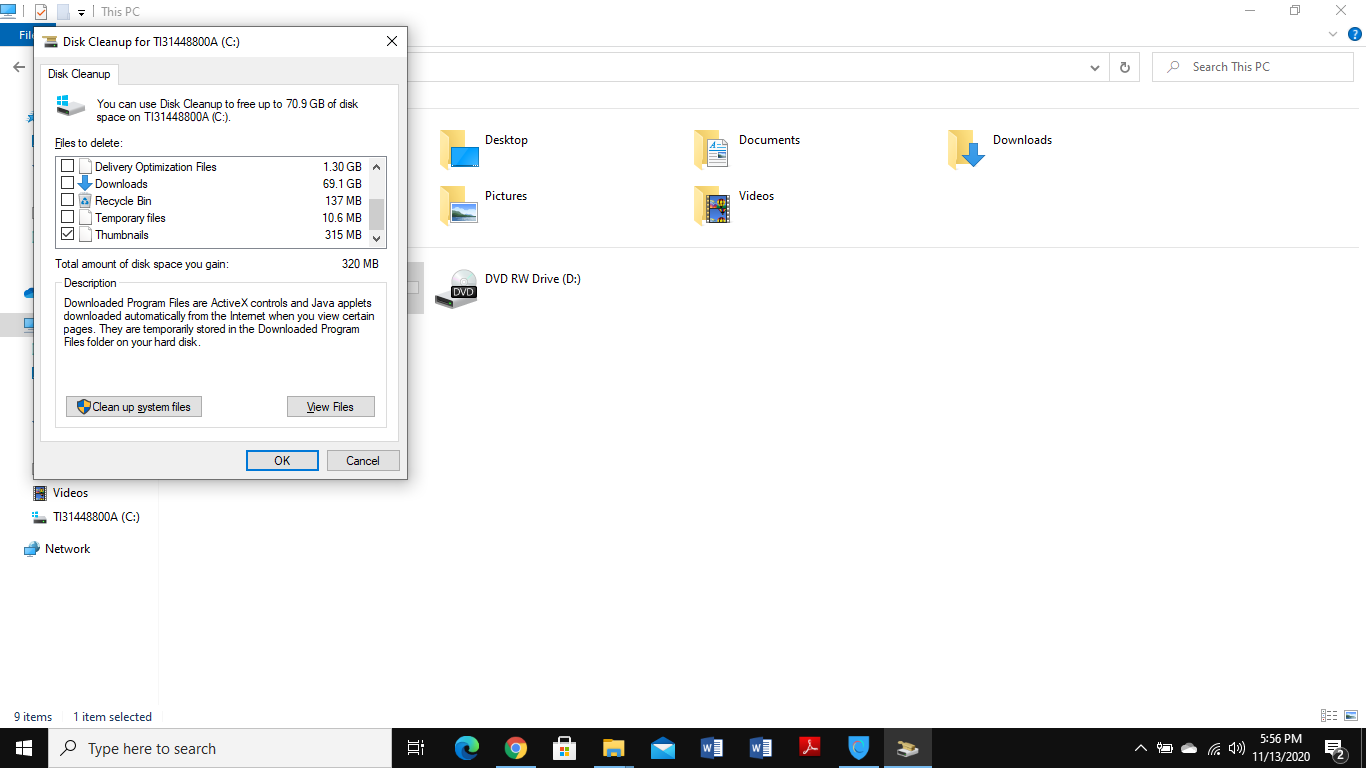
The first method of clearing cache is using the Windows built-in “Disk Cleanup’ feature. Search for “Disk Cleanup” and launch it. Then, select the C:\ drive and click on “OK”. Windows will start analyzing your drive to identify how much of your disk space can be reclaimed. The process might take a few minutes depending on the amount of data stored in that drive. Once the results are displayed on your screen, you can select the different types of files you want to clean up and then proceed with the actual removal.
How to clear browser cache on Windows 10
Clearing important caches, it is important that you consider occasionally cleaning the browser caches as well. This will prevent the browser from crashing as well as several web pages.
Google Chrome
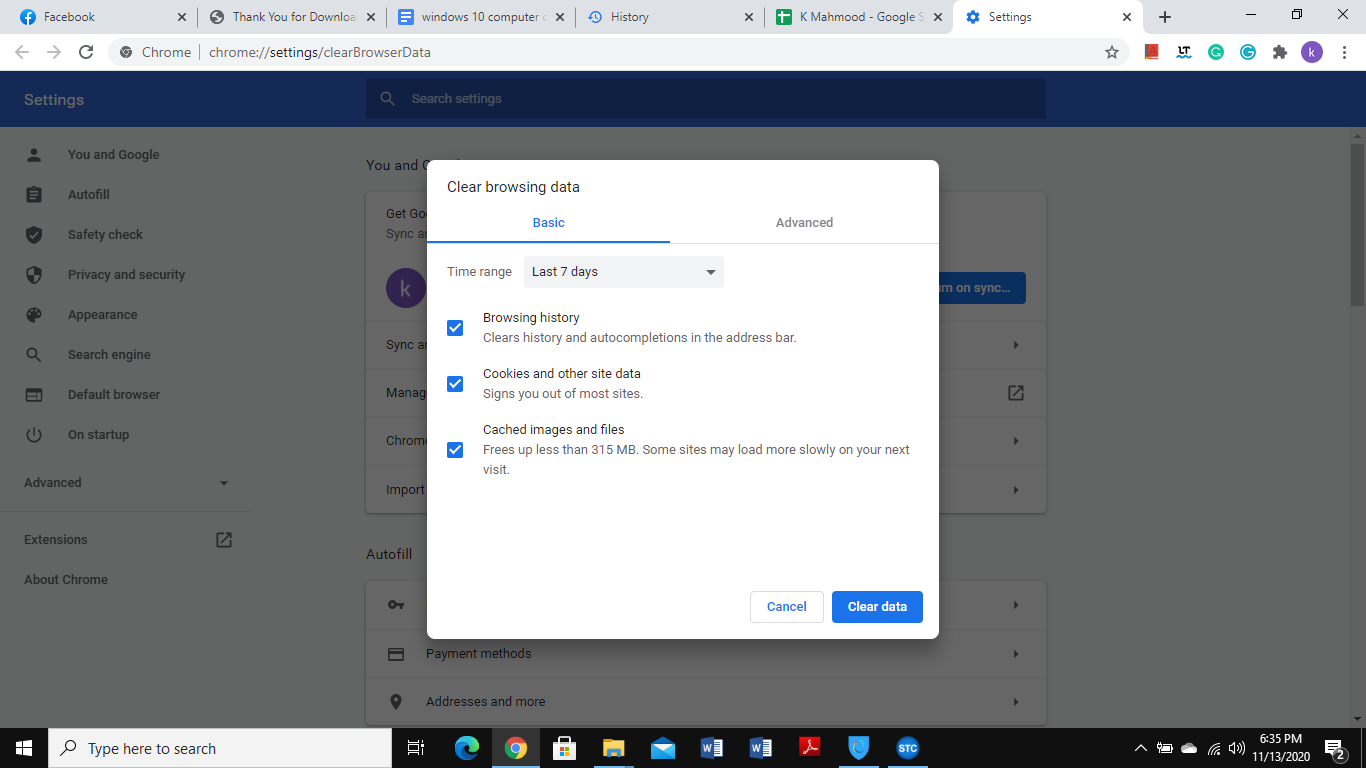
To clear Google Chrome browser history, click the Menu icon (three dots) located in the top-right corner. Visit ‘History’, and then ‘Clear browsing data’. Click the ‘Clear browsing data’ in the upper right corner. From the options, select ‘Cached Images and files’ along with the ‘Browsing history’. Within a few seconds, Google Chrome will clear the entire cache.
Microsoft Edge
If you wish to clear cache in Microsoft Edge, click the Menu icon (three dots) and visit the ‘Settings’. Then, click on ‘Clear History’ and select the files you wish to clean.
Clearing Cache Using STCleaner
If you want to go deep with cache cleaning, try the STCleaner software. It thoroughly scans your drives and allows you to clear cache and temporary files in an instant.
To do this, visit STCleaner.com and download the app for Windows. Once the application has been installed, launch it. Since it is a lightweight app, the installation will not take long. Upon launching the app, you will come across the user-friendly interface of STCleaner that does not require rocket science to become familiar with the features.
Click on ‘Scan’ to initiate the scan process. STCleaner will take a few minutes until it completes the scanning process and informs you about the potential amount of storage space that can be freed.

Click on ‘Clean Now’ for the STCleaner to wipe out unneeded cache files.